
Finally, a post about actual sewing! The Waver Jacket, a versatile piece of outerwear from Papercut Patterns, has been the number one make-on-my-mind since the late-summer. I bought the pattern as we emerged from the UK’s first lockdown and, nearly six months on, have only just finished fiddling with it.
I’ve talked before about giving yourself a break creatively, but taking it really slow without stopping altogether is sometimes a great way to gently re-engage with your practice. The coat pictured here is a real testimony to that idea.
Over the summer, and I think this may have been evident from the content of this blog, I kind of lost the will. I was still sewing, sure, but the excitement over making was more ebb than flow. I know I’m not alone in this; it’s the unsurprising side effect of months of worry, uncertainty and heartbreaking news on repeat. Having something to think about, ponder over, play around with as and when the mood took me, was both physical and mental sanctuary.
This jacket saved my sewjo. So, why did it take so long? And what did I find out along the way? Read on to find out!
The Waver Jacket: a brief pattern review
Let’s start with a little review of the pattern as it stands straight out of the packet (or printer). To look at it, you might not immediately recognise the potential. Seriously, what’s with the styling? I’m not sure I understand it.
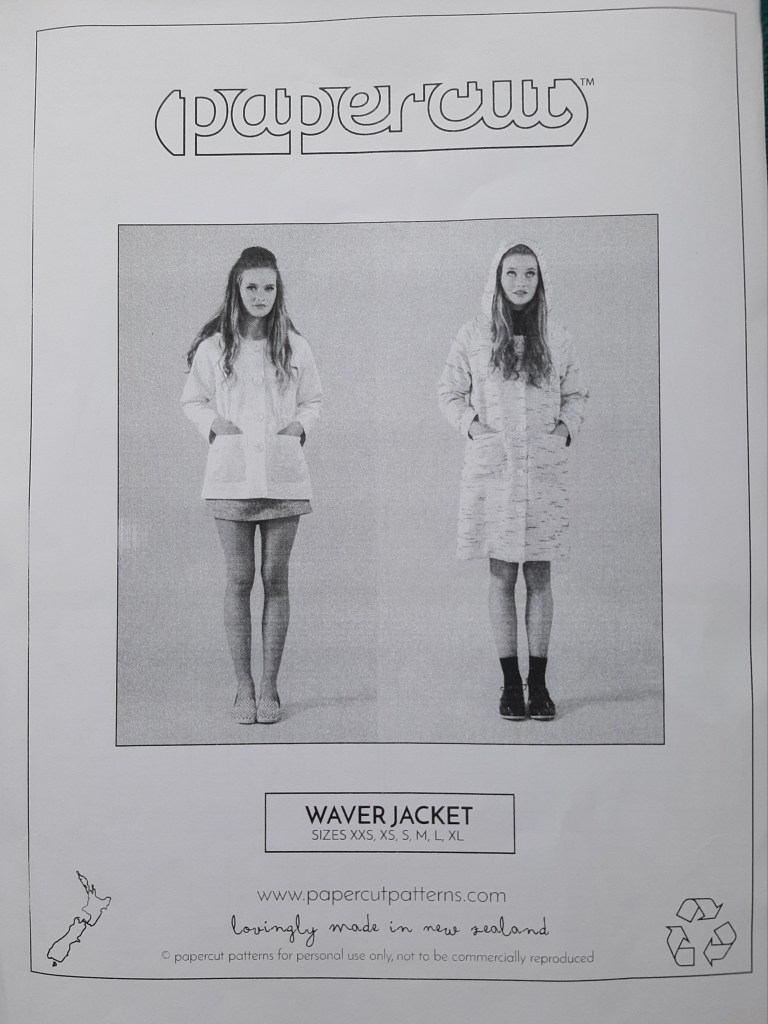
It’s a curious choice given that the Waver can become the most glorious winter coat. It will take a bit of work, a bit off faffing and redrafting, adding and removing, but it’s definitely worth the mither.
Don’t just take my word for it: hop on to the Waver Jacket hashtag on Instagram and you will be greeted by a host of beautiful wax cotton versions.
Papercut seems to have missed a trick here – I can’t help wondering if adding on a hood extension, re-shooting the pattern cover in a waterproof or wax coated fabric, and adding a few tips for outerwear fabrication would pay dividends. After all, the cut is perfect for rainwear: the raglan sleeve is not only a good-looking design and easy to sew, it also reduces seamlines along the horizontal axis – a definite bonus when the heavens open. Still, what would blogs be for if we didn’t have anything to add to the conversation?!
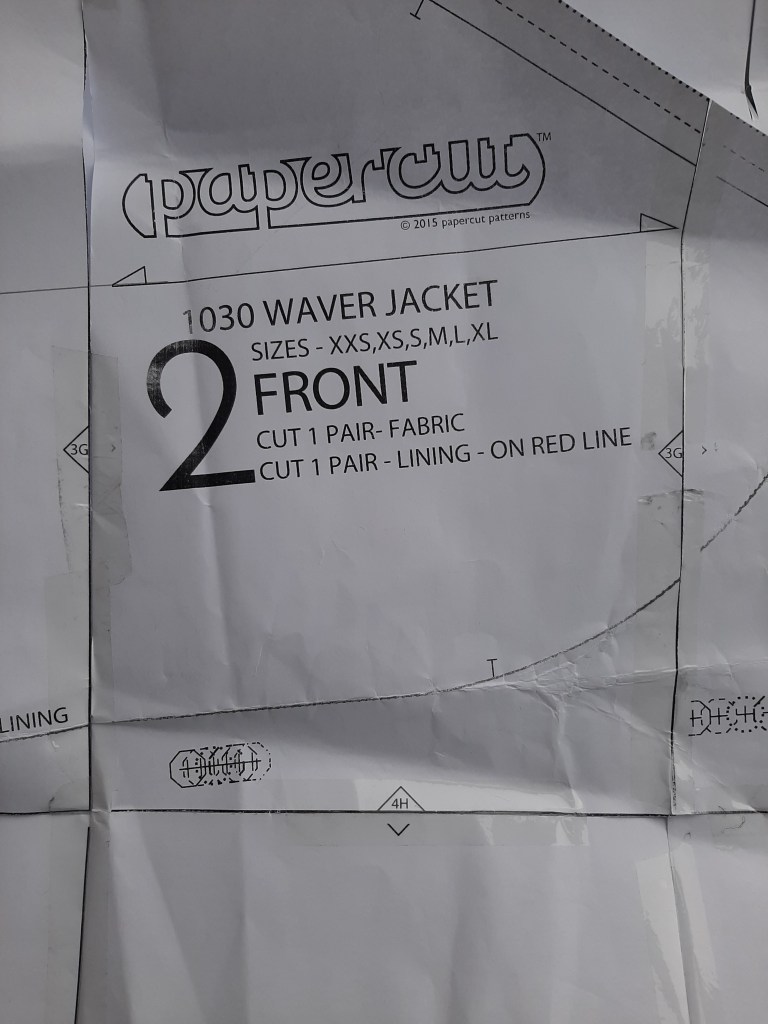
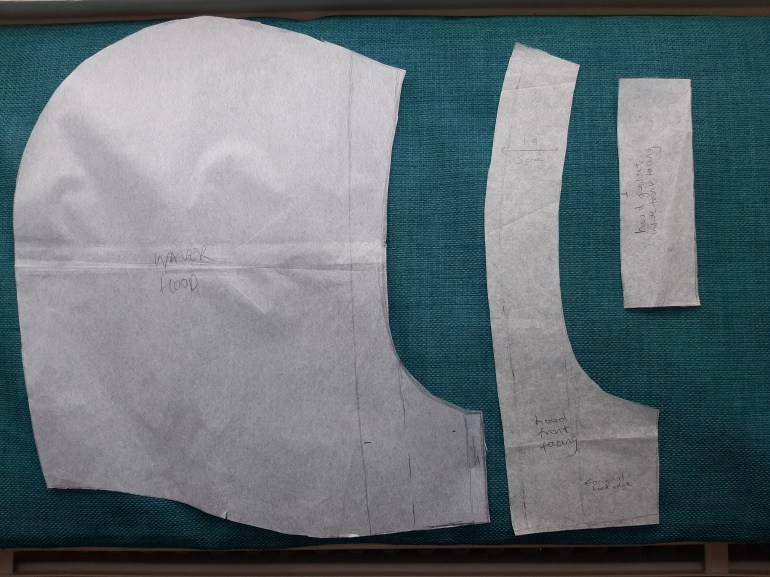
I have one small gripe about the actual pattern, and I mention it because I think all designers should bear this in mind when deciding on presentation. I know colour lines make patterns easier to decipher, but for those of us stuck at home with a black and white A4 printer, telling the maker to cut lining to the ‘red line’ isn’t helpful. There are so many lines from the taping process it really is a guessing game half the time (see pic below of my crumpled PDF).
Having said that, once you’ve figured out which lines are which (and I’m sure not everyone is quite the luddite I am), the pattern comes together speedily.
Most importantly, it’s well drafted. The details for lining and bagging out are nice and neat (keep to the exact seam allowances, and your front corners will be a thing of wonder!). Sizing is spot on. I went with the size advised for my measurements and it’s just right: there’s enough room to add lining and interlining and feel cosy but not cosseted. The roomy design gives a pleasing Scandanavian feel to the garment; I love the clean angular lines (and dispensed with the drawstring waist for this reason).
The thing I really like about this pattern, if I’m honest, is the sense of achievement you get from turning the summery jacket in the illustration into something distinctly outdoorsy and practical. I’m not the first to tread this path with the Waver, but even so, it’s a really enjoyable wander and, if you’ve not tried before, a great way to get into pattern hacking.
Making the Waver
On to the fun stuff. I made a ‘wearable’ toile first, in a lightweight water resistant fabric given to me by Minerva.com in exchange for review. Even though I had my eye on a number of tweaks already, I sometimes like to give a pattern the run through in its virgin form before ad libbing. This helps ensure sizing is right and I’m happy with the fit before wreaking havoc with pattern pieces.

I found the sleeves were a bit on the short side, so I made a note to add an inch to the pattern. I didn’t line this version, as it was to be a summer mac, so I simply overlocked the edges and top-stitched the facings in place. This works fine, but I would say the overlocking is a little too close to the edge, and can be seen when the lapel lies open. Probably best to line. The pattern recommends using the same fabric for the hood lining as the outer. That was fine for this fabric, which was very soft, but for anything more ‘raincoaty’ I would recommend using something softer to line the hood.
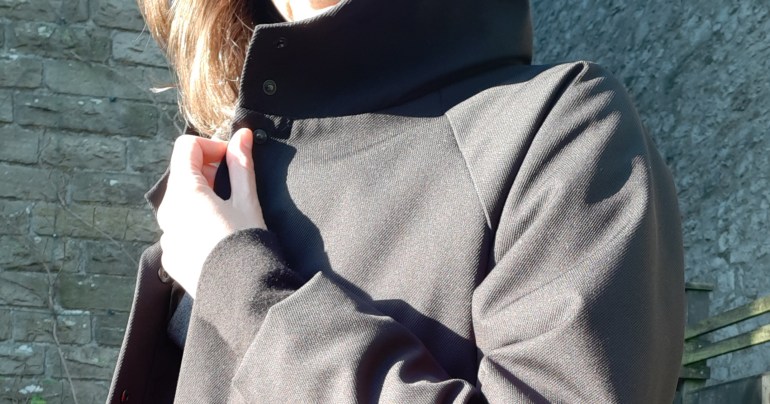
As I suspected, the detail around the hood and button placket was not for me. I don’t really dig the way it looks buttoned up (though it works unbuttoned) and, as mentioned above, it is a distinctly unpractical feature: as soon as the wind gets up (and it does aplenty round here!), the hood blows down and you will be soaked.
Pattern hacks
Hack 1: the hood
From the pattern packet it’s clear that, despite having a hood, this wasn’t really designed as an outdoor weather kind of coat, more a fashion jacket. So fair enough. But I live in the freezing northwest of England, and on a breezy drizzly walk you need your hood to stay put! So, time to get hacking to turn this into a coat worthy of a winter wonderland!

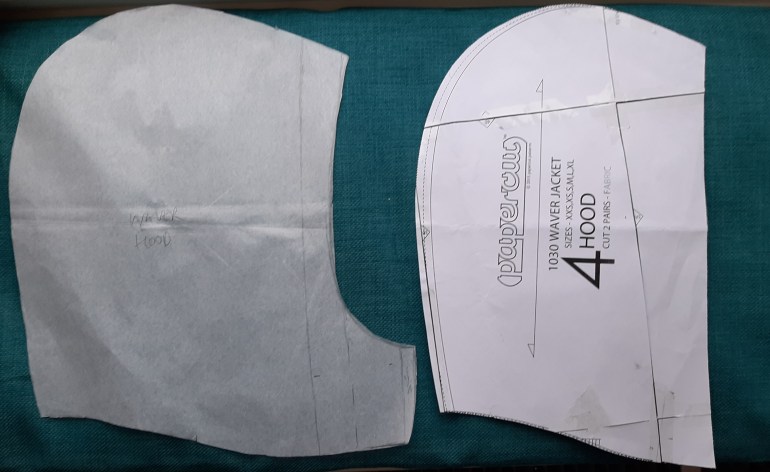
I took inspiration from @sewsarahuk, @bobbyclover, @mariondubataillon, @the.slow.sewist and other makers on Instagram to hack the hood into something more robust. Laying a piece of pattern tracing paper over the hood pattern piece, I traced the shape and then added about an inch to the front of the hood, tapering out slightly at the top so as to form a gentle peak. The curve is not an exact science – as you can see it was drafted fairly roughly.
To draft the projection at the lower front of the hood (which creates a funnel neck when fastened), firstly extend the lower edge so that it will line up exactly with the front edges of the coat. Measure how high you would like the funnel neck to be (luckily I could use my toile to work this out), then scoop a curve from that point to the extended front edge above. I’m hoping the pictures will be self-explanatory – as I write this I realise I am making it sound far more complicated than it actually is! Don’t forget to also add 5cm to one short end of the hood gusset while you’re at it.
When cutting out, instead of cutting two hood pieces in outer fabric, I cut one. I then created a new pattern piece to create a front facing for the inside hood. From the top, I measured 5cm (including seam allowance) in from the new front edge of the hood piece, and continued that down to the bottom of the pattern piece. I also cut out a 5cm strip the width of the hood gusset.
I cut these pieces in the outer fabric. Then, laying the facing pattern pieces over the hood and gusset pattern pieces, I traced the inside cutting line and added 1cm for a seam allowance. Folding the pattern piece back to this line, I then cut out the second hood piece and gusset piece in lining fabric. This way there is a decent lip of outer fabric around the inside of the hood, which gives a neat finish and a little extra rain protection.
To assemble the hood:
- Sew outer hood and gusset pieces RST, as directed in pattern instructions.
- Sew shortened inside hood and gusset lining pieces RST, as directed.
- Sew front facing and gusset facings together in outer fabric, RST, as in steps 1 and 2.
- RST, sew the facing pieces to the lining pieces, using 1cm seam allowance. Press.
- Now sew the outer assembled hood to the inner assembled hood, RST, as directed in the pattern. You will be sewing the inside facing to the outer. Follow the seam all the way around the funnel neck and down to the neck edge. Clip curves and corners, layer seam and press.
- Understitch seam allowances to the inside front facing.
From here, construction remains the same – the hood is sandwiched between coat outer and facings and sewn RST. Make sure the front lower edge of the hood is completely aligned with (pushed right into the fold of) the front facing. I found it helpful to baste the hood pieces together first to keep them aligned, and then to baste the hood to the outer, as you may find you have to do quite a bit of easing to get it to fit with notches and seams. This is particularly true if you interline (see hack 3, below).

Hack 2: the cuffs
Although I had toiled this coat, and noted a 1″ extension to the sleeve pieces, I somehow failed to enact said amendment, and went ahead and cut out the second version at the same length. Does anyone else do this?!
I didn’t have enough fabric to rectify, and I didn’t want to reduce the seam allowance, so I decided to add cuffs. It was a blessing in disguise: my old raincoat had these and they are surprisingly effective at keeping out the chill and giving gloves the chance to work optimally.
Here’s how I put them together.
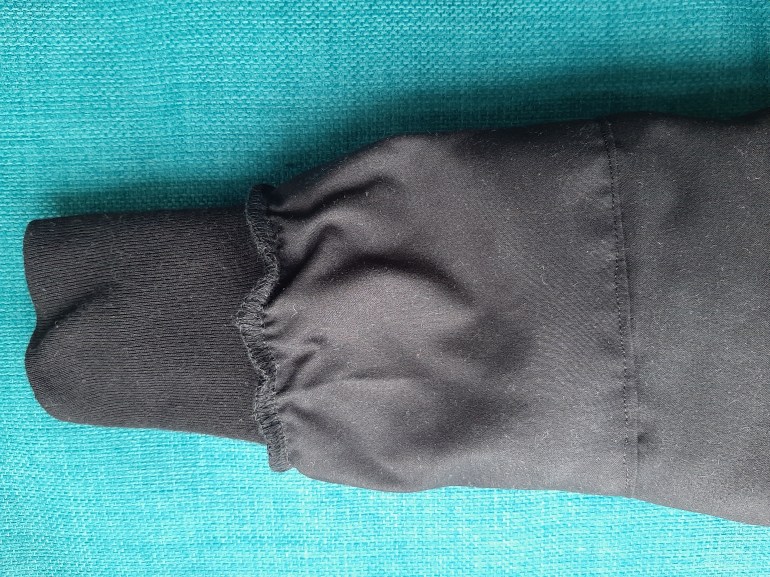
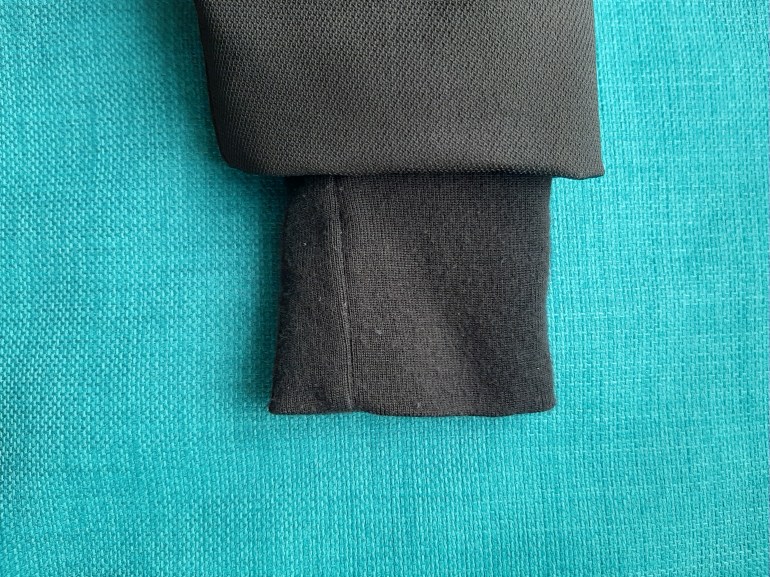
First, I made a long cuff out of jersey ribbing fabric. Construction was exactly the same as for a sweater cuff: cut two strips, fold RST, overlock long edge, fold over WST and they’re ready to attach.
I worked out where I wanted the cuff to come to (covering the thumbs), then, using the sleeve pattern pieces, created two further ‘tubes’ in lining fabric. These were cut in a sort of mirror image of the lower portion of the sleeve (with the widest points meeting in the centre). The long edge was overlocked RST and then the resultant tube folded in half WST so that the fold is at the widest point. The end with the raw edges was then overlocked to the cuff (the cuff has to be really stretched to fit as you sew). Finally, the lining tube is top stitched on to the sleeve lining.
This has to be done before you finish the sleeve hems. It is a bit of a wiggle-athon sewing it in position, but the added comfort is definitely worth the effort!

Hack 3: adding interlining
This isn’t exactly a hack, but it’s not in the pattern so hey ho. I wanted this coat to be as warm as possible. I had my eye on a future version with Thinsulate, but didn’t want to invest before I knew whether the extra padding would work with the pattern or whether it would end up being a bit too bulky. As chance would have it, one of the things I stuffed into my Closet Core pouf was an old mattress protector for a double bed we no longer own. It was perfectly serviceable apart for the fact we didn’t have a double bed, and I felt rotten about throwing it out knowing it might not actually go onto a charity shop’s shelves. Cue brain wave.
You guessed it, the protector was the perfect size to be cut up and remade into an interlining. The wadding is thin and not high quality, so I wasn’t expecting that much in terms of warmth, but it would give me the opportunity to see if the extra layer would work. I decided to interline the sleeves as well as the body.
To interline, I cut the extra pieces to the lining cutting lines and then placed the interlining WST with the lining. I sewed the pieces together around the outer edges so there would be no slipping around, and then proceeded to make the coat as directed, treating the interlining and lining as one.
The coat is really warm. I think it could probably be warmer, but we’re in December now and it was completely serviceable on the school run with snow on the ground this morning, so I’m pleased. The fact it’s not boiling is probably a good thing as it’s all polyester and this may avoid a sweat bucket situation…
If I make another, I will definitely be interlining again, and I will know I can go ahead and buy more expensive materials with confidence.
Top tips
And finally, as promised, a few tips to get the most from your winter Waver (or any other coat you choose to winterise).
Tip 1: procrastination pays off
Procrastination gets a bad rap, but sometimes it can be a make’s saving grace. Taking things slow can give you time to think and, in my case, give the brain a chance to catch up with the hands. I wore this coat out and about for nearly two months before I attached the snaps. If I’d rushed, I would have ended up with a poorer final product.
While it may have been reckless risking any number of outing mishaps (mud up your back from a puddle-jumping sidekick, anyone?) before having taken any pictures for posterity, let alone finishing the garment, on this occasion dawdling really did pay off. It gave me a chance to rethink fastenings, realise which fabrics would be best for lining, and made me as sure as I was ever going to be that it would be worth the effort.
Tip 2: choose appropriate fabrics
While I enjoyed the thrill of saving money using a bedliner, this coat could actually be a lot warmer. If I make one again, now I’ve thoroughly tested it out and know what I want to do with it, I will be investing in serious outerwear fabrics.
I would like to make a completely waterproof version, maybe using specially designed outerwear and going for a really high end finish. If you’re interested in this sort of thing, go and check out Point North ProFabrics (based in Cheshire, UK) – I’m building up a virtual wishlist at the moment for when I do finally get round to a fully breathable, fully waterproof, stupendously cosy winter coat.
Tip 3: vary your linings
I am prone to static, which means that skirts and dresses always ride up when I wear tights. And the same applies to coats, unfortunately. This was no exception. Initially, I lined the coat with the leftover water resistant fabric from the first Waver. This fabric is very soft and feels nice against the skin. I also wondered if it might add a little more water resistance to proceedings (probably not given wicking when fabrics are layered, but one can dream).
The result of procrastinating was, happily, that I realised I needed to add an anti-static lining to at least the bottom portion of the coat to prevent it riding up when walking. The cool thing about outerwear is you don’t have to use the same lining throughout the coat, you can vary it according to your needs in each area. So, something warm and snuggly in the hood and the upper body is advisable, perhaps a fleece, and an acetate or satin for the lower portion of a longer coat to prevent static. Sleeves could also be lined with acetate so they’re easier to get on with thick layers.
Tip 4: make a toile before you take the plunge
In general I’m not a toile maker, I just dive right in. Sometimes this does land me in bother. I’ve learned so much about my preferences during this process I would whole heartedly recommend making at least a wearable toile in fabric you’re not too worried about so that you can be sure of sizing, pocket position, design functionality, warmth, etc. etc. I am really happy with this coat, but it may not be my last (more on that below), so I’m glad I didn’t drop an absolute bomb on the experiment (and huge thanks to Minerva for making this possible).
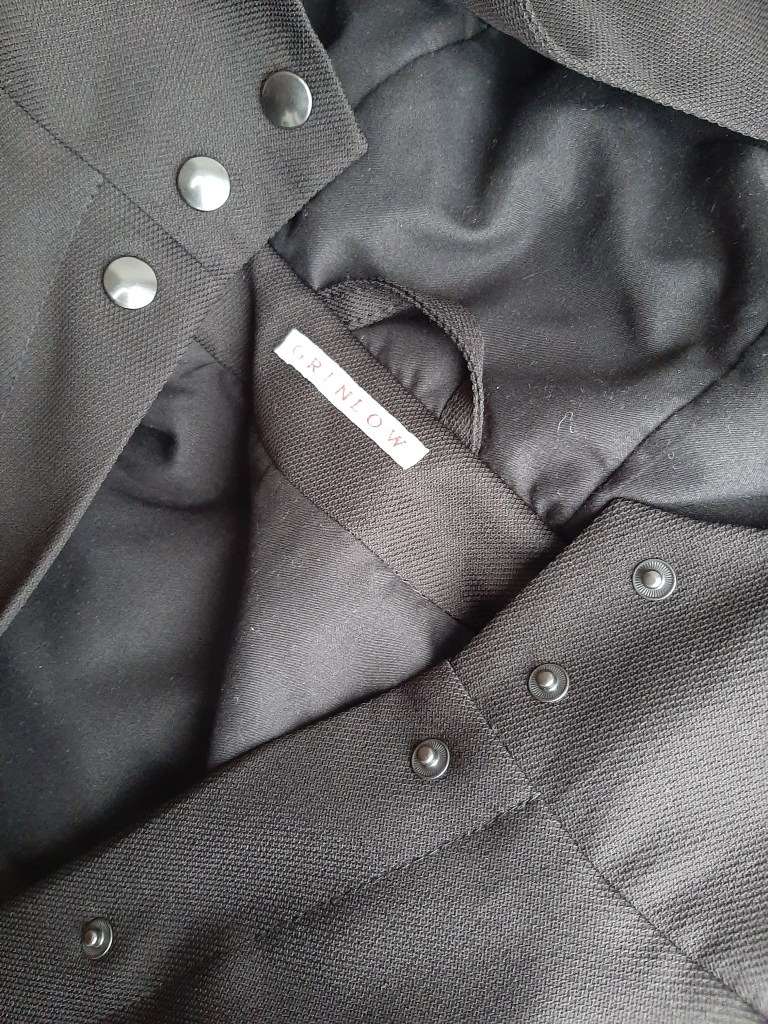
Tip 5: invest in decent hardware
For my first waver I ordered a Kam snap gadget and some random snaps from eBay. I lived to regret it. The snaps did not go on well, and refused to close properly. For the second, I ordered official Kam snaps, but on reflection (procrastinating, see?!) they just looked too weedy for the souped-up coat. So finally I ordered myself some Prym raincoat snaps. These come in a black oxidised metal which, I think, looks great with the coat. It took a bit of practice to get them on properly, but they work really well and feel secure and smart. As the old saying goes, buy cheap, buy twice!
Verdict
In my minds eye, the second version of the Waver was to be an intermediary between the summer mac toile and an expensive wax cotton version complete with Thinsulate interlining, a quilted satin lining and a faux shearling hood. Yet I’m so delighted with this version – a nod to the Swedish raincoats of my dreams – my mind isn’t made up yet about whether to venture any further. Knowing my penchant for coat making, don’t be surprised if I’m hitting you up with another even toastier version next winter.
There are a few tweaks I would make if I made another version. I noticed that the hood, despite having added to the front edge, still sits quite snug at the top of my head. It dawned on me this might be because my neck is quite long. So next time I might add an inch to the length of the hood too. (Whether or not I will remember to add that from my pattern notes is another matter. Big old eye roll!)
While I’m at it, I would either add pocket flaps with snaps, or go for a slanted half-welt pocket – I find an angled pocket a little more comfortable and I am a hands-in-pockets kinda gal. Why not throw in a few inside pockets too?
I would also up the ante with materials, and consider sealing seams properly so they are fully water repellant. Finally, I think adding a zip would be a good plan for extra draft exclusion (something along the lines of the Kelly Anorak would be a good jumping off point).
Despite the distant promise of a third foray, I’m really rather happy with this coat. Thank you to Minerva for making this experiment possible by giving me the fabric for both summer toile and winter parka (in return for review on Minerva.com). If you want to read more about the fabrics used visit my profile on the Minerva blog or read the blog about the winter parka here.
P.S. If you buy the Waver Jacket pattern direct from the Papercut Patterns website, the PDF version is currently on sale for around $10 US dollars (correct at the time of writing). And no, I’m not on commission!
So, are you new to sewing outerwear or do you have some hard-won top tips to share? I’d love to hear! Let us all know in the comments below.

That jacket looks so, so good!
LikeLiked by 1 person
Thank you so much! x
LikeLike
The cuff hack, pure genius !
LikeLiked by 1 person
Love those cosy wrists! xx
LikeLike