
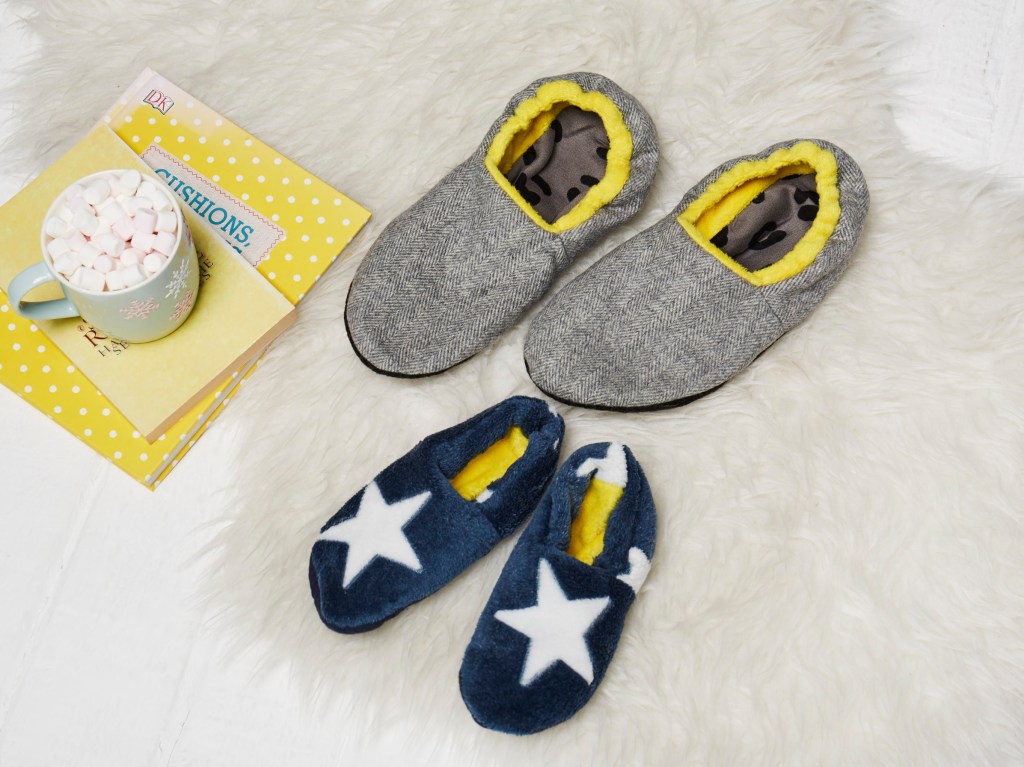
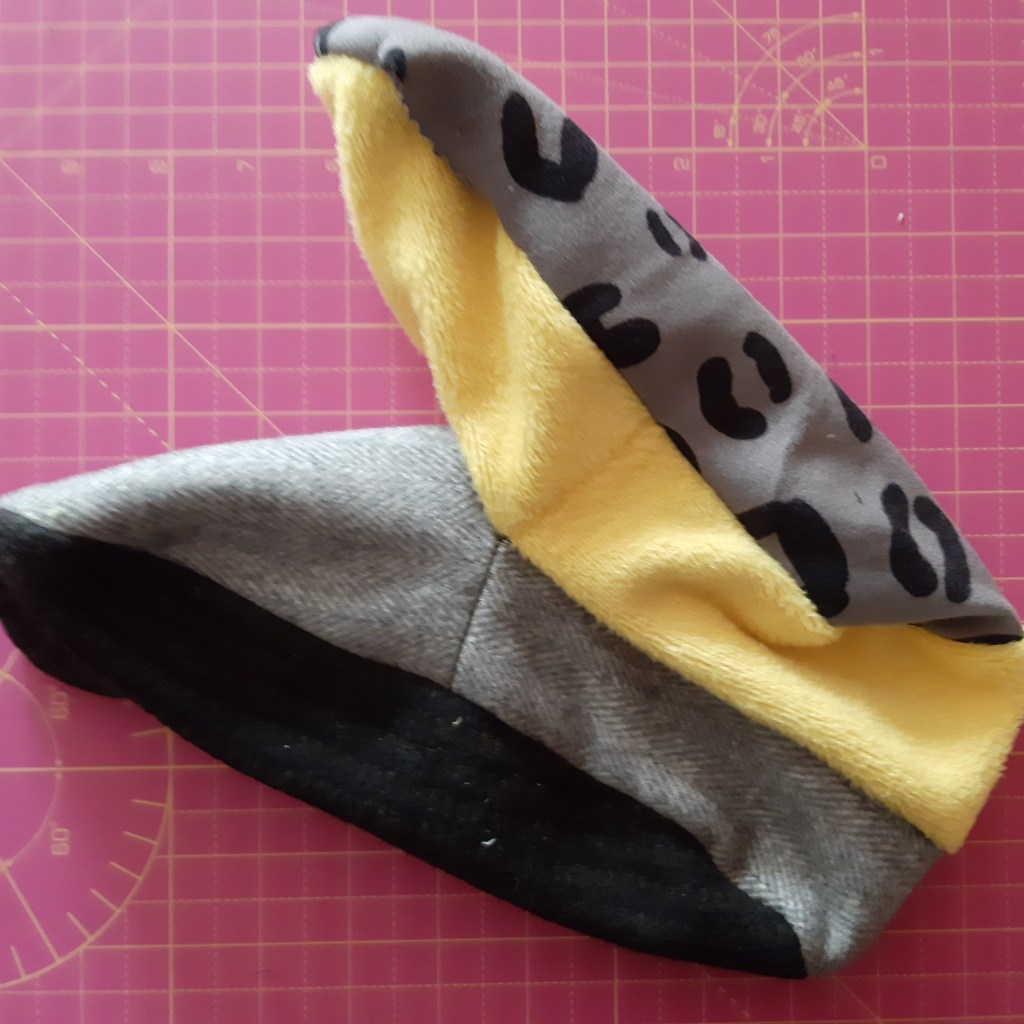
With temperatures dropping and the cost of fuel soaring, now is a pretty good time to put those sewing skills to work in the service of keeping warm. And what better way to start than with a pair of super-cosy house slippers. These soft-soled toasty toe warmers are perfect for carrying about in your bag, ready to be whipped out when the occasion arises.
Not only is this a very handy make, and one you can put together for anyone and everyone (so long as they will allow you to draw around their un-shoed foot) it’s also a brilliant scrap buster. I like to use leftover coating fabrics for the outer – in particular, a very scratchy heavy duty wool for the sole – and soft stretchy fleece-back jersey for the lining.
For anyone worrying about slipping, there are non-slip fabrics on the market (Hemline sells one in a small pack, available on Amazon), but I have found these wear away extraordinarily fast and the result is disappointing. Instead, it might be worth using the small rubber beads you dot on the soles yourself.
Materials & tools
For drafting
Rulers – ideally a French curve and a straight ruler
Tape measure or bendy ruler
Paper, pencil, pens
For sewing
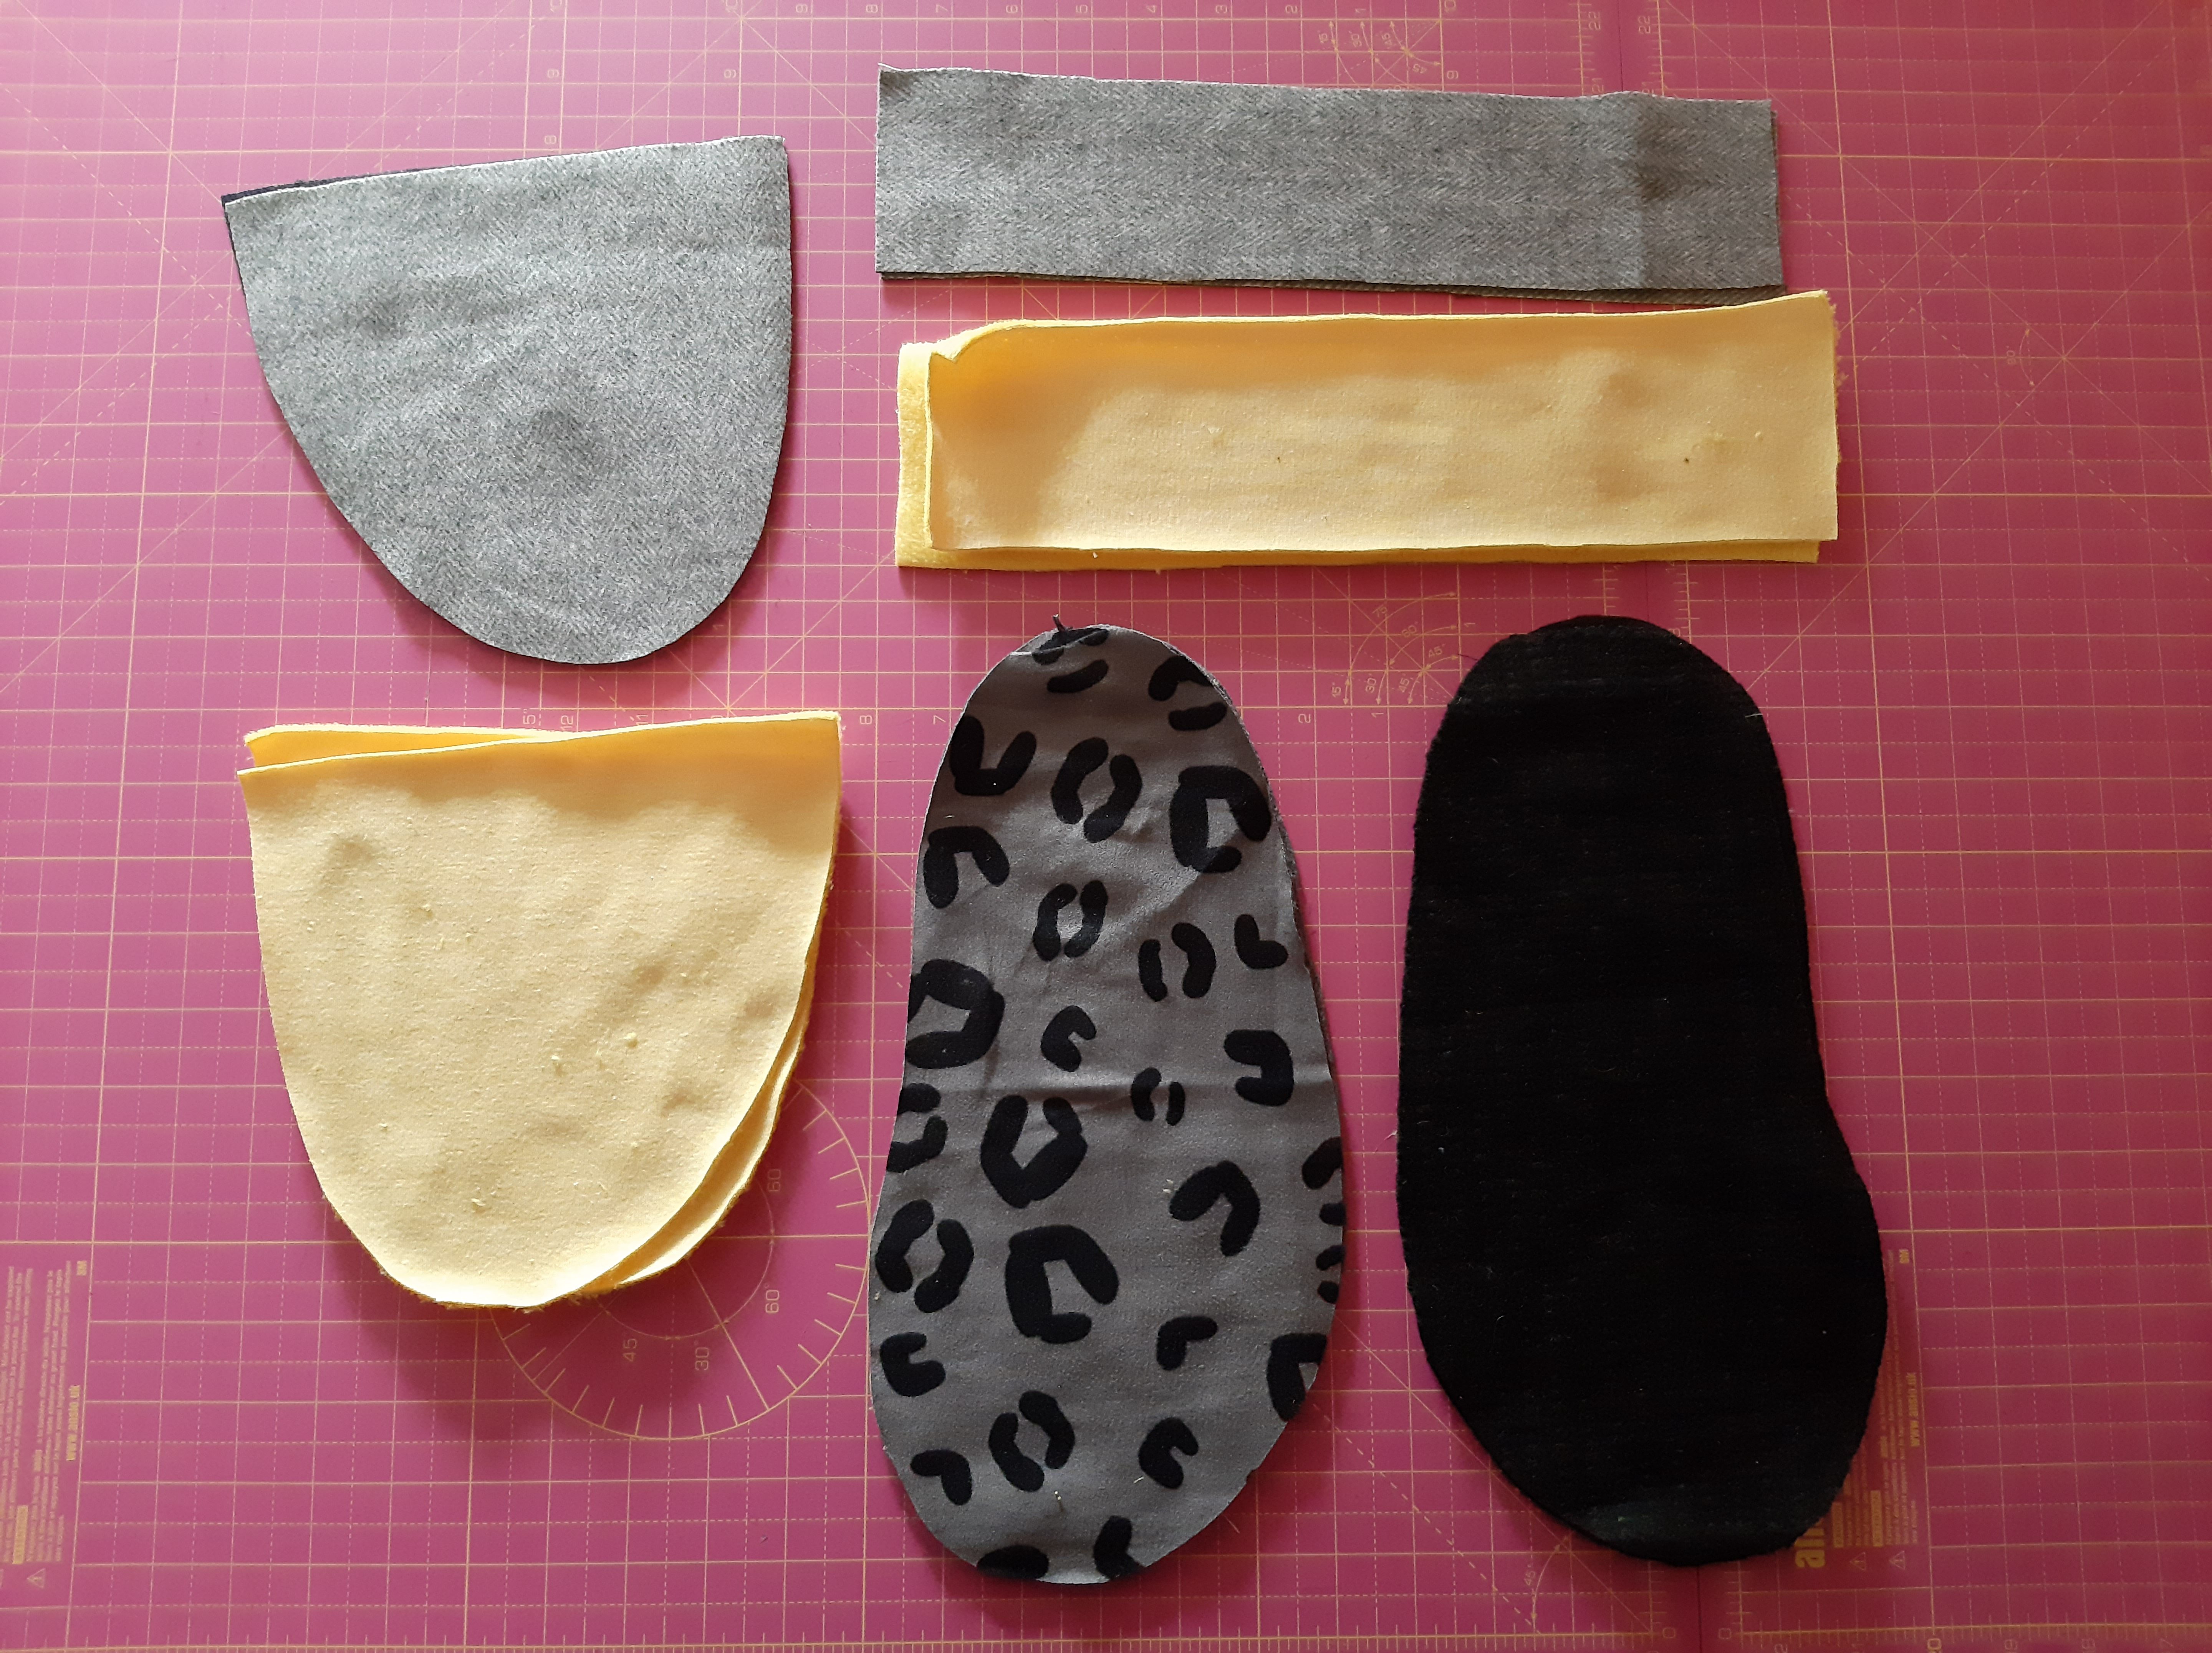
0.25m wool, fleece, velboa or faux fur for main fabric
0.25m jersey, faux fur, shearling, fleece or velboa for lining fabric
0.25m non-slip fabric (optional)
0.25m wadding (optional)
0.5m of 1cm wide elastic (enough to stretch around the heel)
Co-ordinating thread
Draft your pattern
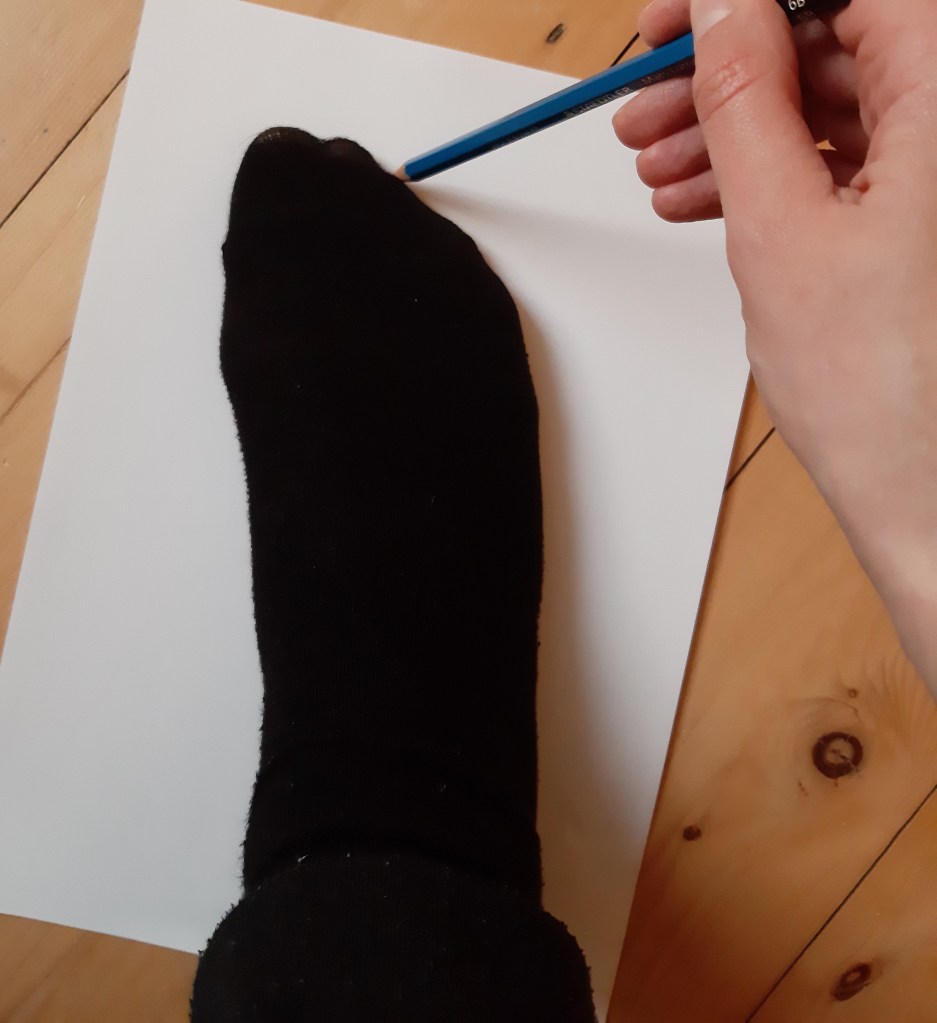
1. Draw around the foot.
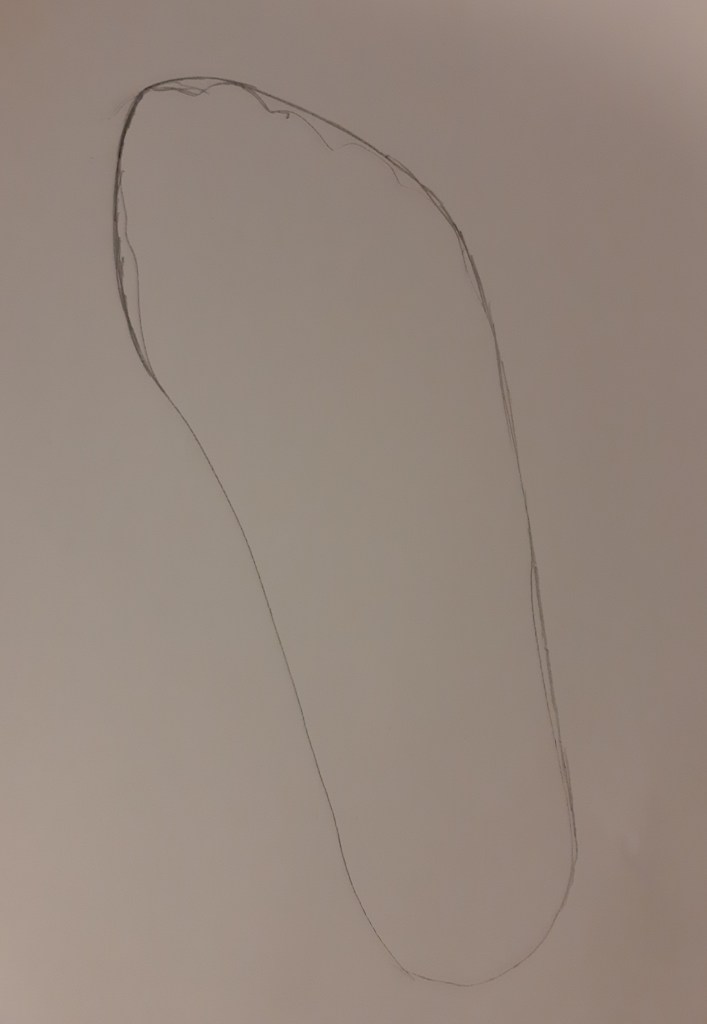
2. True the shape so it is a smooth line.
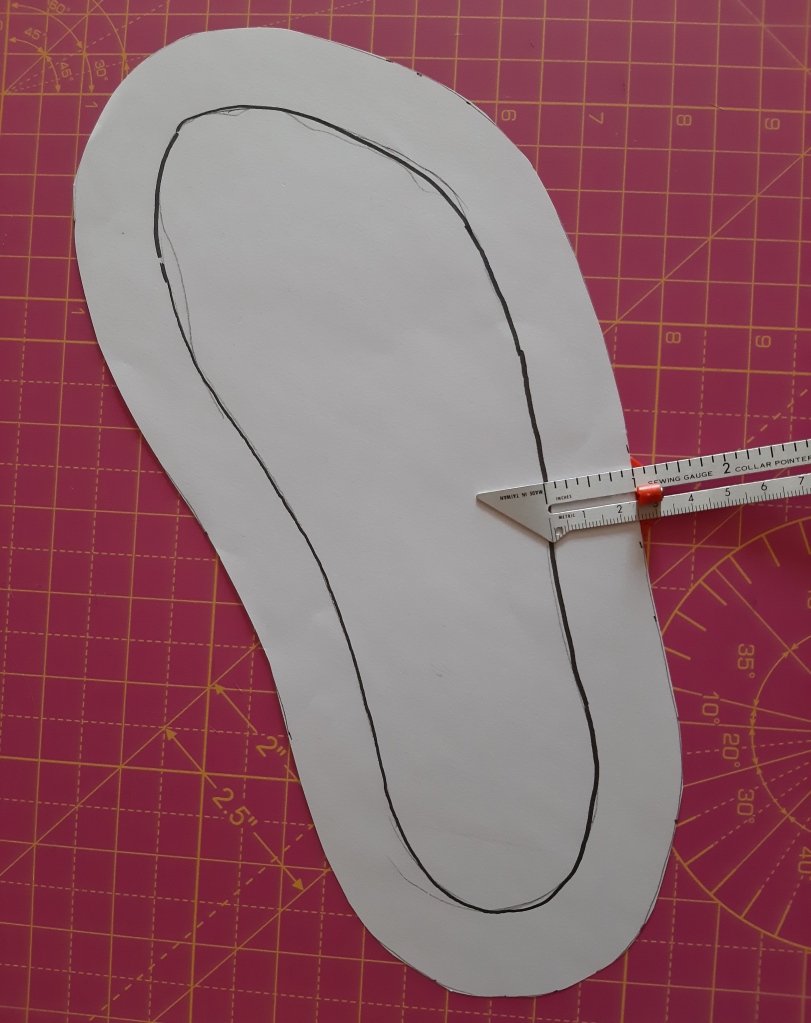
3. Add 2.5cm all the way around – for seam allowance, wearing ease, and a little extra to play with during the fitting stage. This is your sole pattern piece.
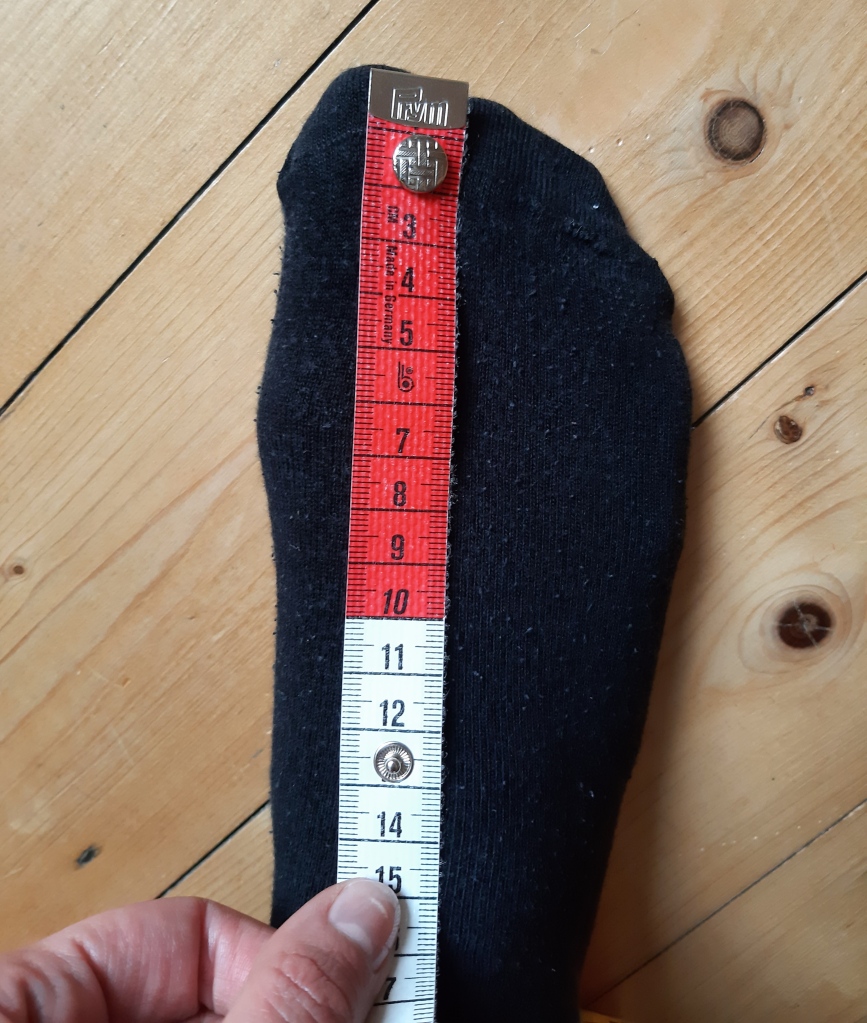

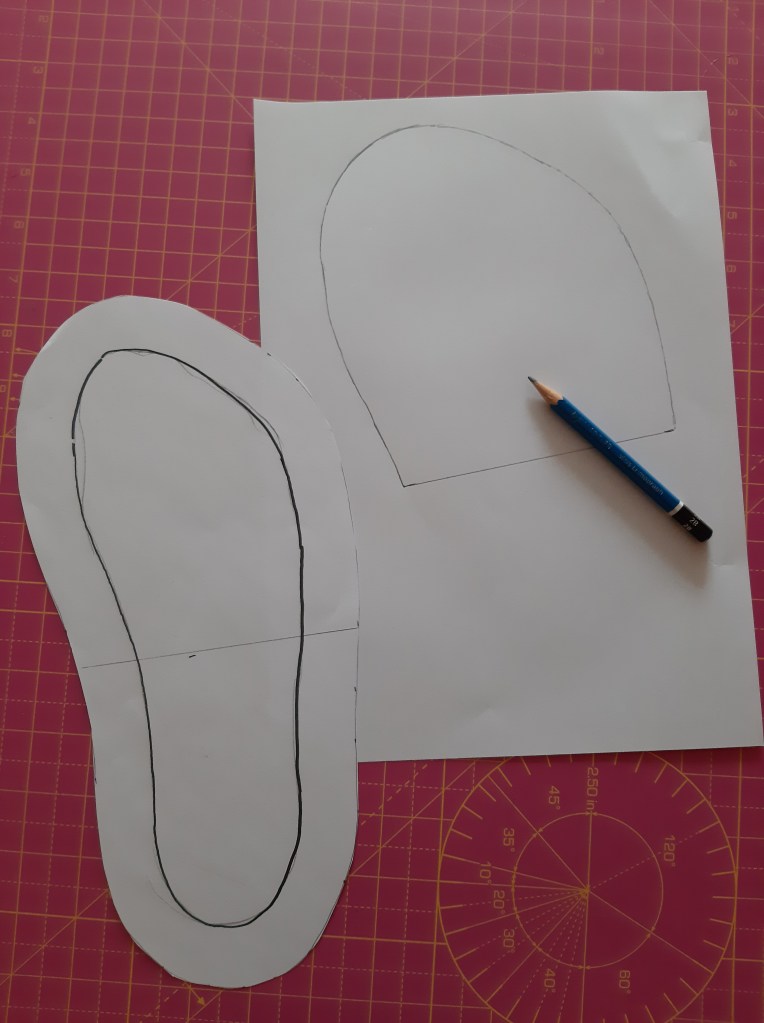
4. Now create the upper front pattern piece. Using a tape measure, measure from the tip of your toe to a comfortable spot about 1” lower than the ankle and include a 1.5cm seam allowance. On my foot, this was 14cm.
5. On your pattern piece, measure from the tip of the toe (not including the 2.5cm you just added) and measure up to 14cm. Draw a line straight across.
6. Trace your sole pattern piece up to the extended line.
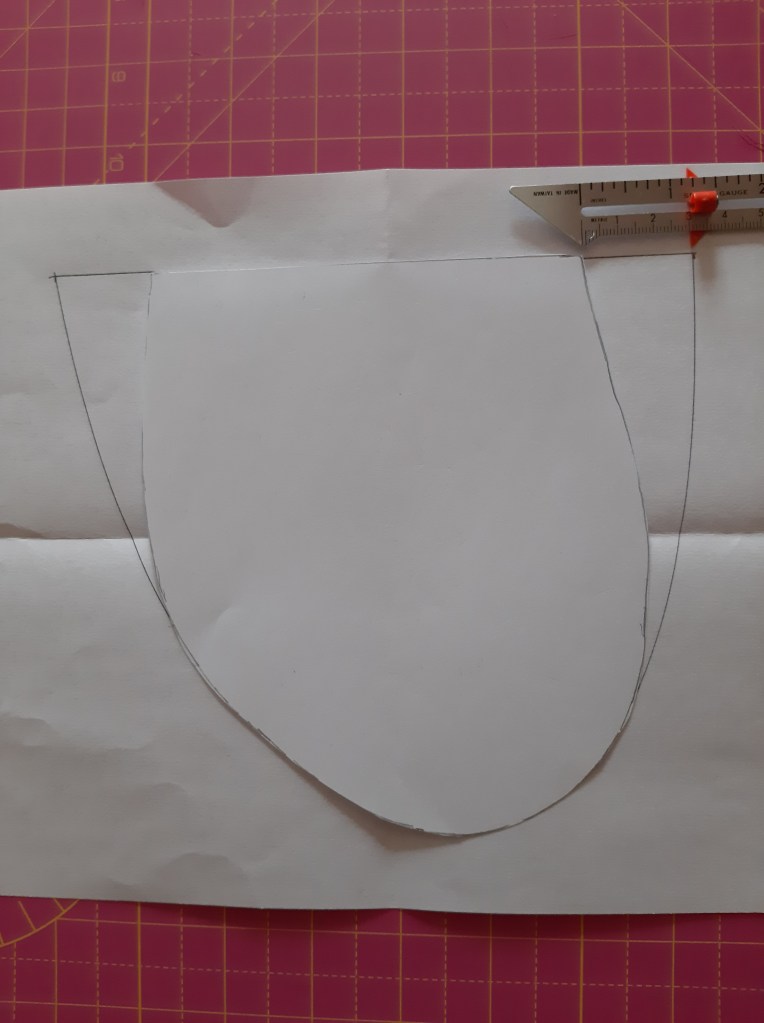
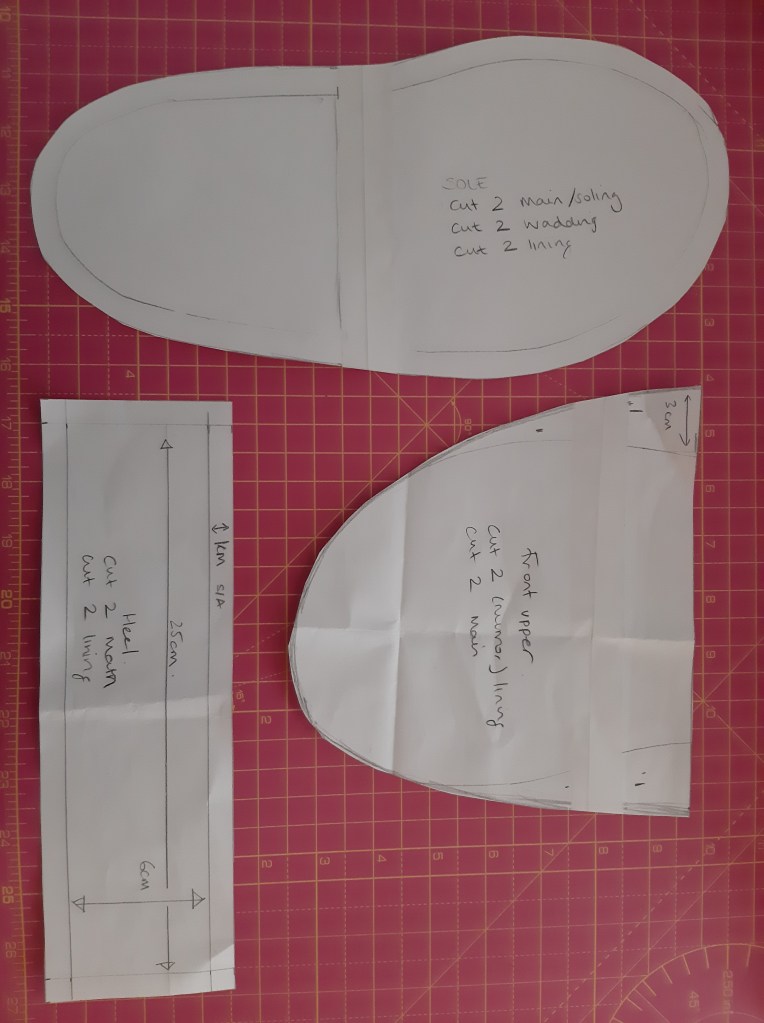
7. Extend the line 3cm on either side upper front, and then draw a freehand curve connecting the toe to this extended line as shown.
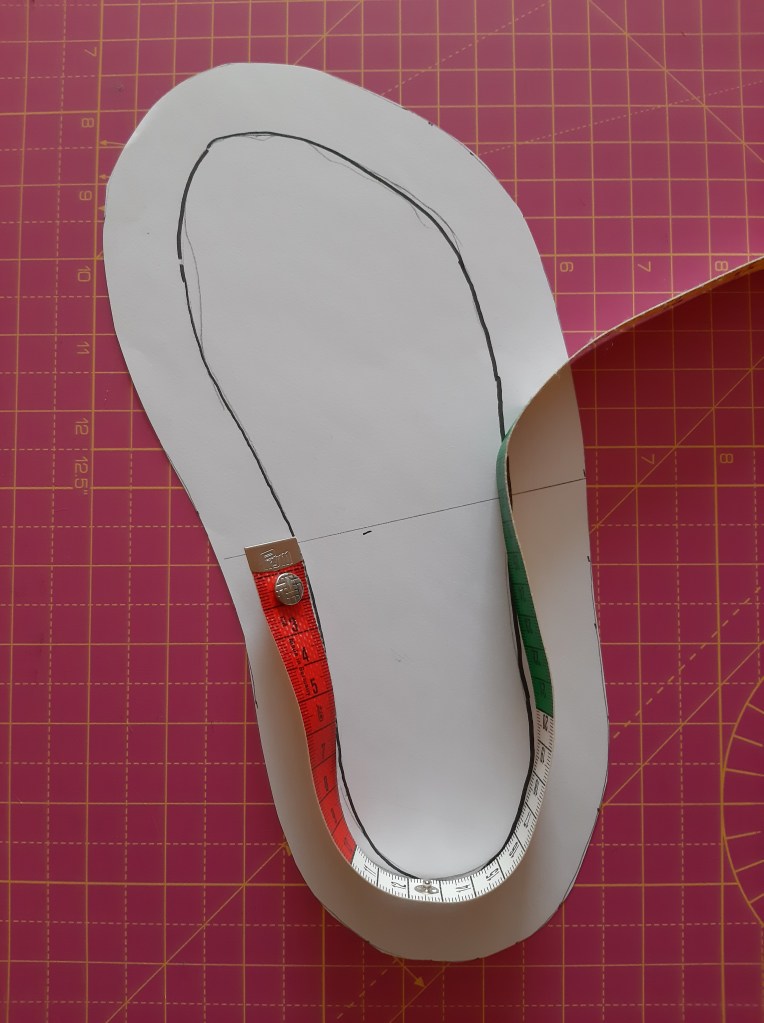
8. To make the heel piece, take a tape measure or bendy ruler and, on your sole pattern piece, measure the heel curve (not including the 1.5cm seam allowance) up to the line for the upper front. Taking the tape measure to your foot again, measure from the ground to under your ankle bone at a comfortable spot for your slipper to come to. For me, this was 6cm.
9. On a separate piece of paper, take this measurement, plus seam allowances, and create a rectangle. My rectangle measured 32 x 8cm. This is your heel pattern piece for the outer fabric. Cut your heel lining piece 0.5cm higher to allow for the elastic channel (32 x 8.5cm).
Cutting out
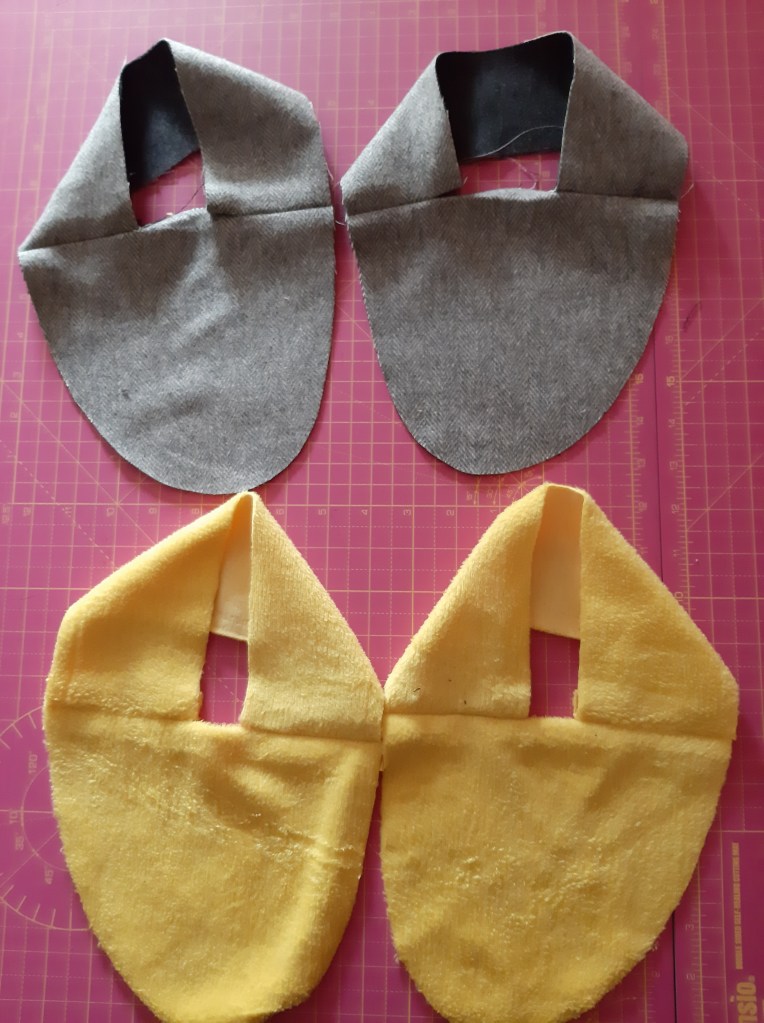
Sole
Cut one in main fabric, one in lining fabric
OPTIONAL: cut one in wadding and one in non-slip fabric
Upper front
Cut one in main fabric, one in lining fabric
Heel
Cut one in fabric, one in lining fabric. Remember to cut the heel lining piece 0.5cm higher than the main fabric piece to allow for the elastic channel
Time to make!
Please note: seam allowances are 1.5cm to allow for fitting. Once confident of fit, seam allowance can be reduced to 1cm. I recommend making a toile before committing in final fabric.
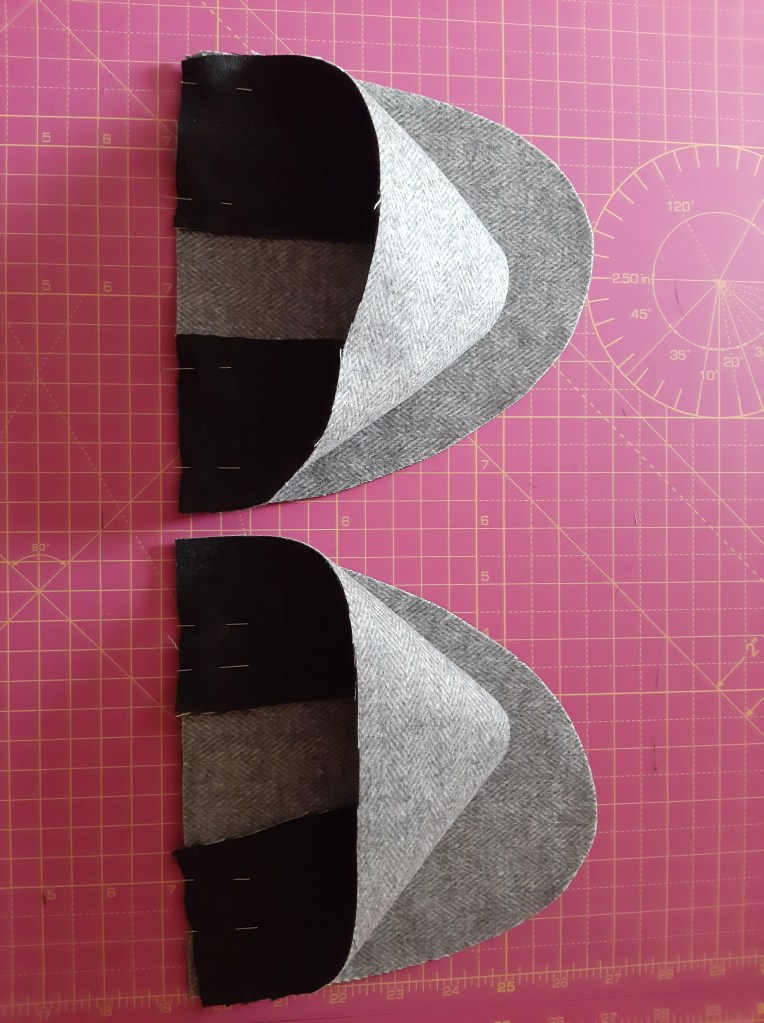
1. Using the main fabric, first pin the short ends of the heel piece to the square end of the upper front piece, RST.
2. Stitch, leaving the final 5/8” on the inside unstitched. Press.
3. Repeat for lining.
4. If using wadding, baste this to WS of your main fabric sole. If using non-slip fabric, baste this to RS of your main fabric sole, with the non-slip side facing out.
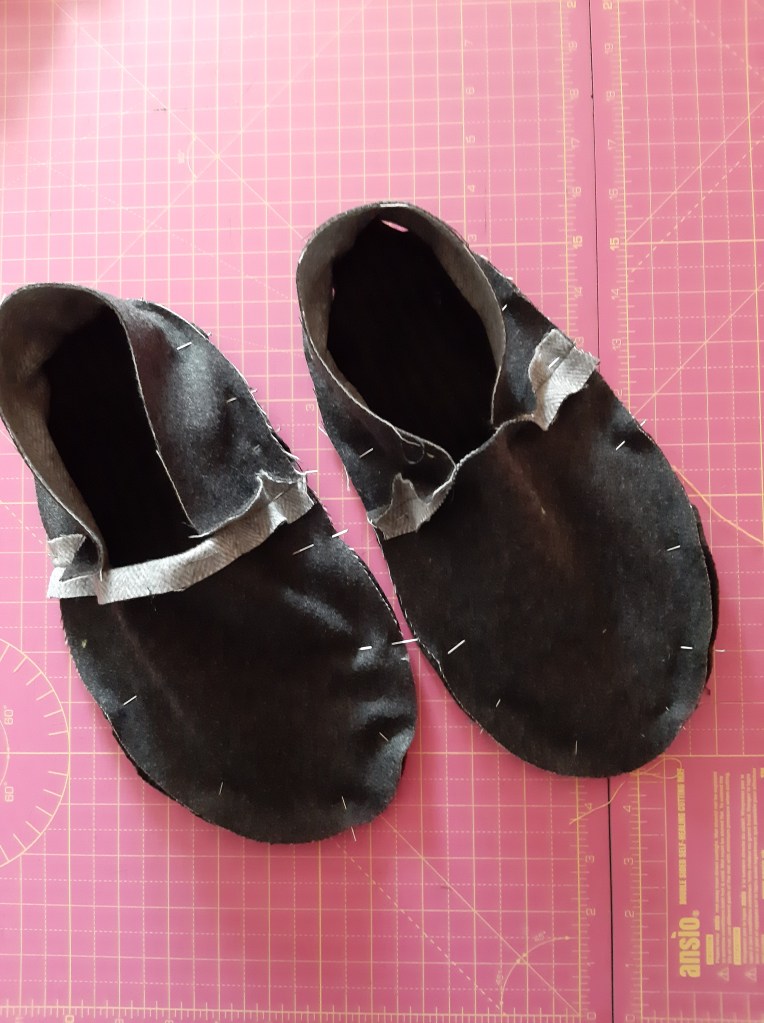
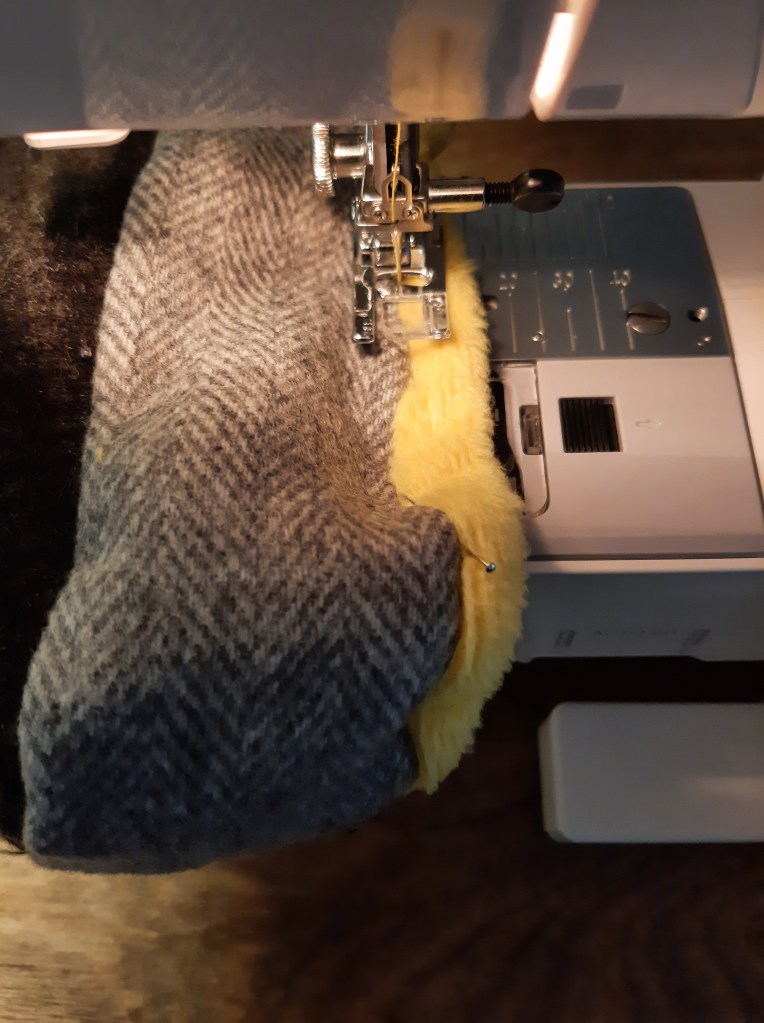
5. Pin the sole (and basted layers if using) to the heel and upper front RST. Stitch together. Press.
6. Repeat with the lining fabric, this time leaving a small gap for turning at the side. Backstitch around this opening to secure seam.
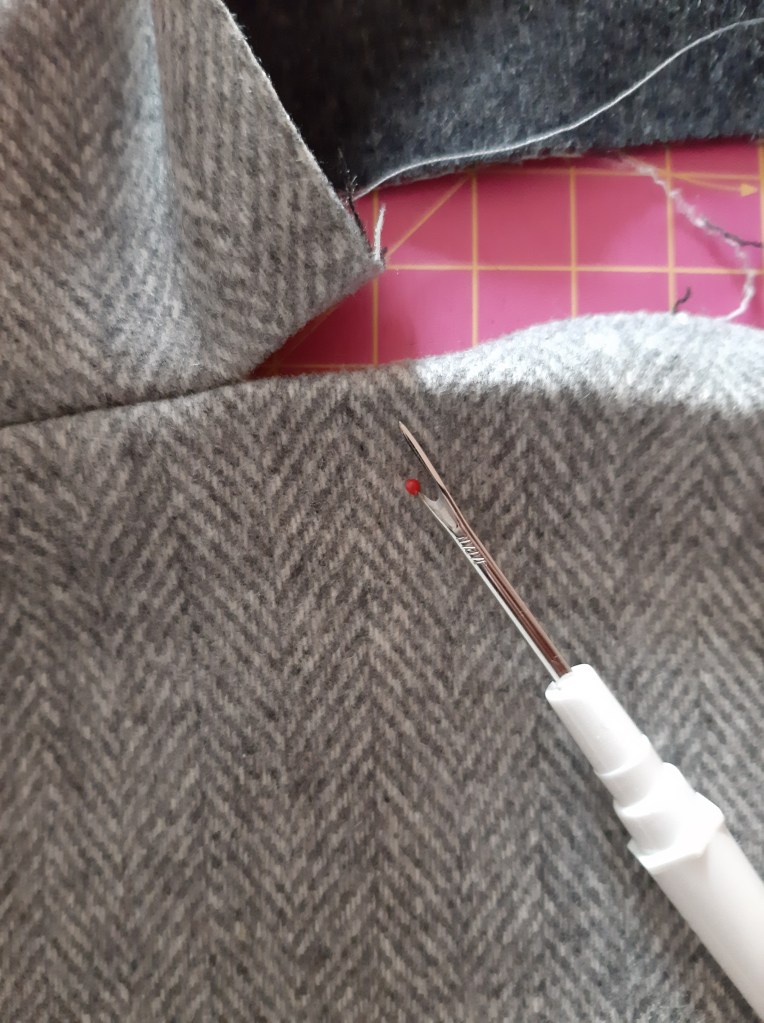
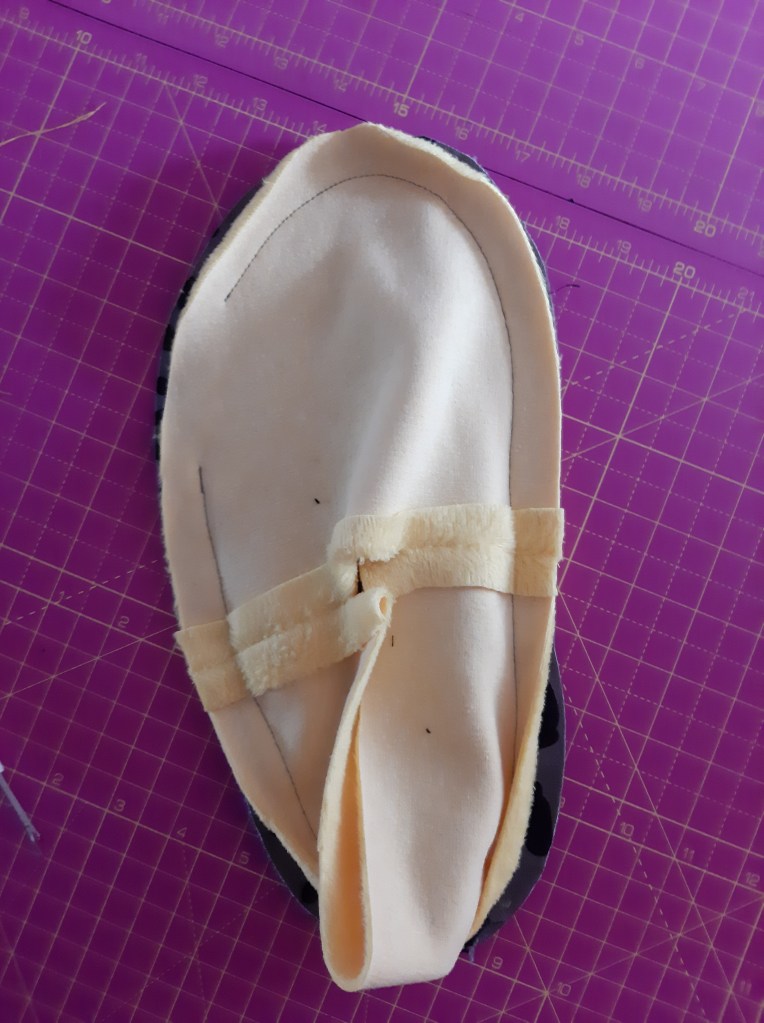
7. Keeping the main fabric RS out, and turning the lining inside out, slip the main inside the lining and pin around the foot opening. Stitch around the opening, taking care to stitch right into the corners where the upper front meets the heel (the bit left unstitched in Step 2). Taper the seam from 5/8 at this point to 1/4” around the heel, grading out to the full 5/8” again at the other side to provide more height and support at the heel.
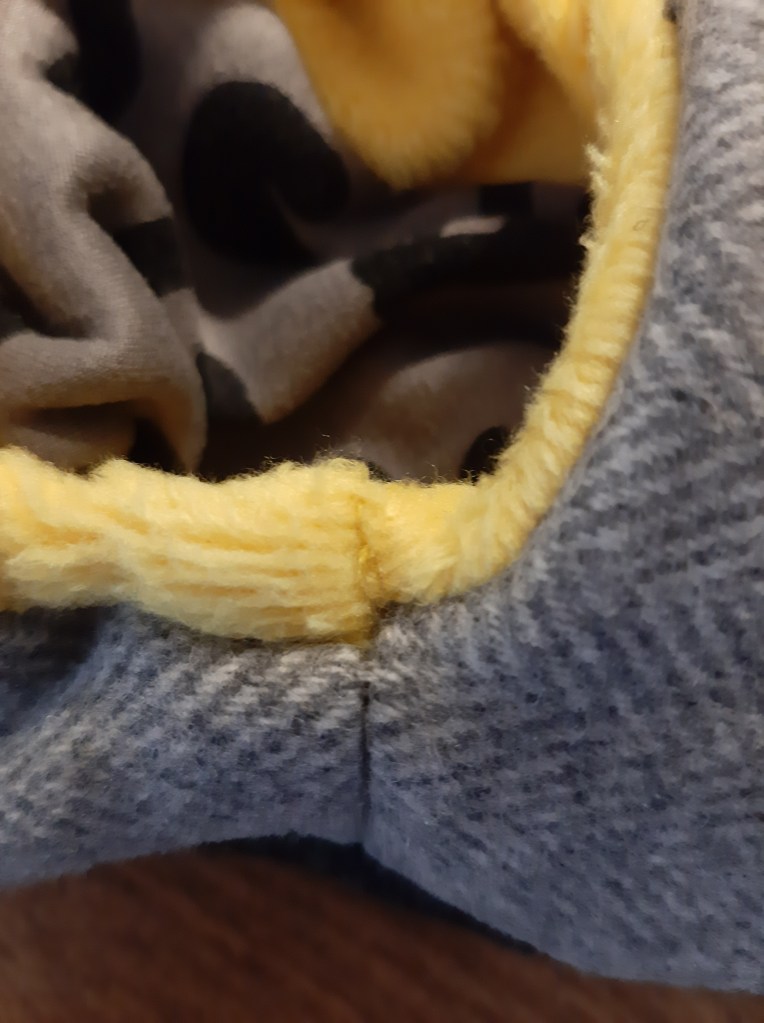
8. Turn right way out, by pulling the slipper through the turning gap. Tuck the lining back inside the outer, wrong sides facing, and try on. Adjust fit if necessary: if using a bulky fabric, you may need to increase the seam allowances on the lining so it sits snugly inside. Once happy with the fit, trim seam allowances down (and make a note on your pattern piece for next time), turn the right way out again, and press. Do not slip stitch the turning gap yet!
9. Take your elastic and, wearing the slipper (it will gape around the heel), measure how much elastic you will need to hold the slipper securely in place. The elastic needs to stretch from left side seam around the heel to right side seam.
10. Reaching inside the slipper through the turning gap, position one end of the elastic over the seam joining the upper front to the heel piece. Secure with a pin and then stitch over the seam to secure. Check the elastic is flat throughout the channel and do the same with the other end on the other side. Now, pulling the elastic taught, create a channel by pulling your lining up slightly so it shows above the heel outer. Pin the elastic in place along the channel. Stitch all the way around, taking care not to stitch through the elastic.
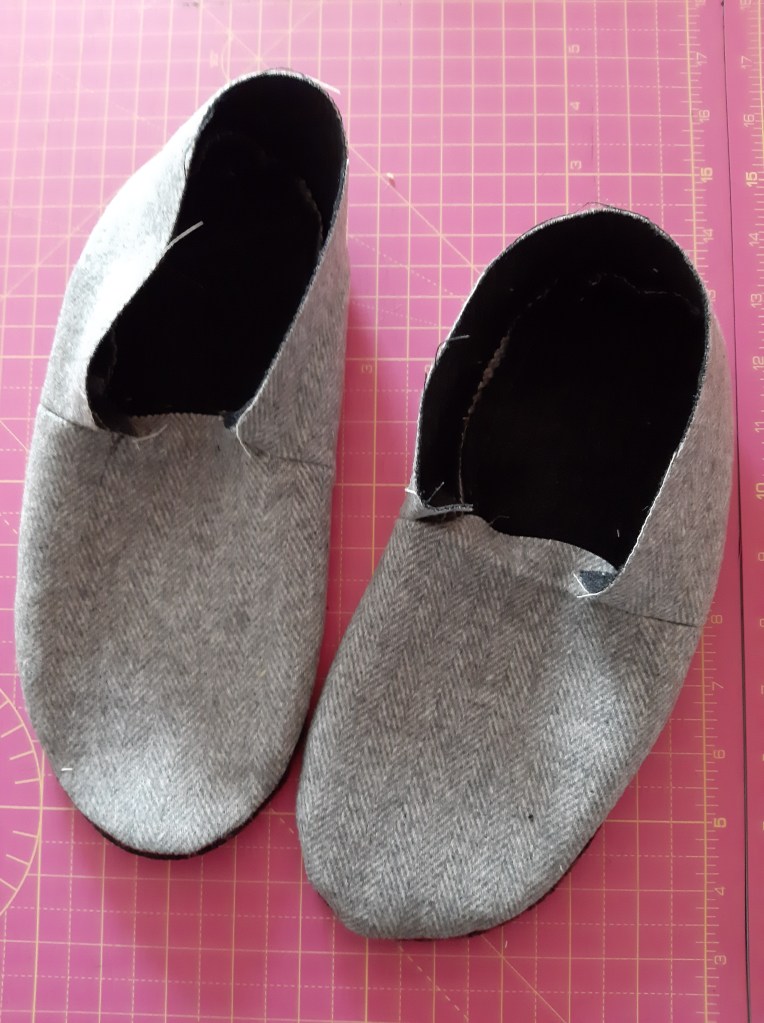
11. The heel should now bunch up and feel comfortable and secure when worn.
12. Once you are happy with the fit, slip-stitch the opening in the lining closed.
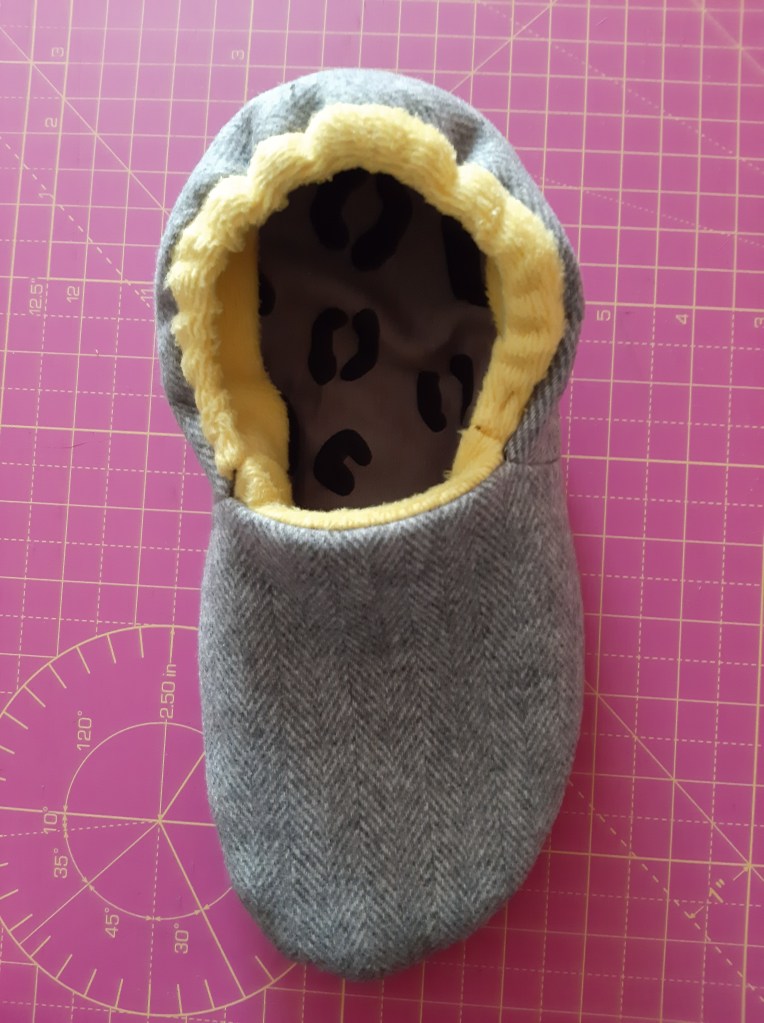
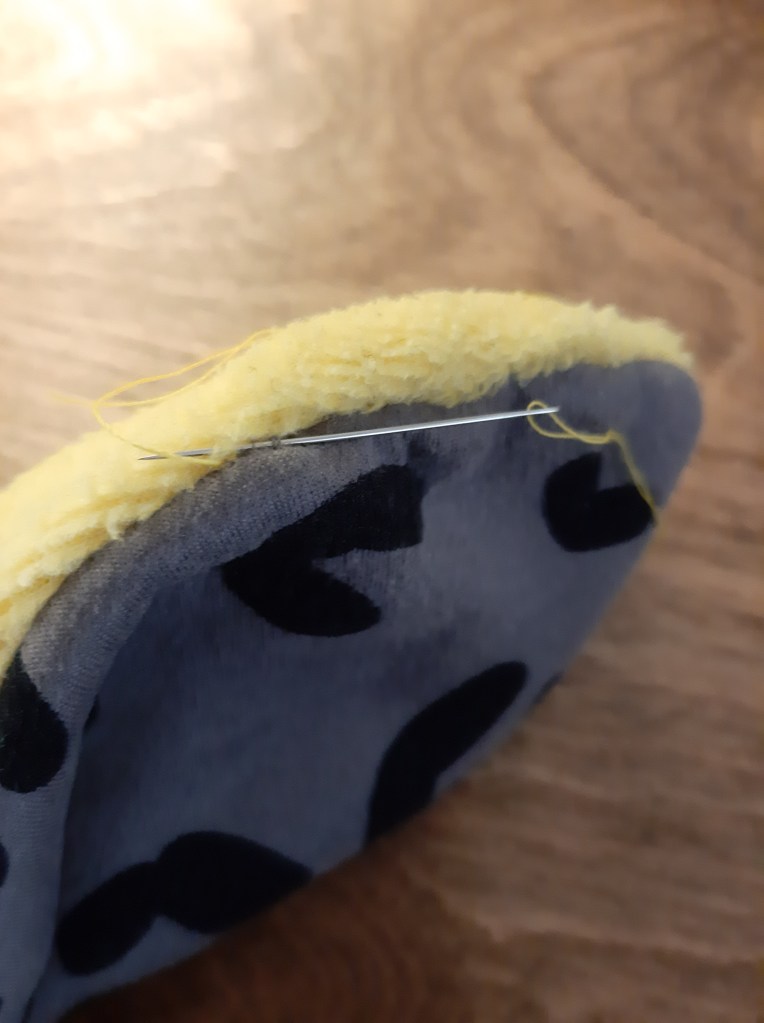
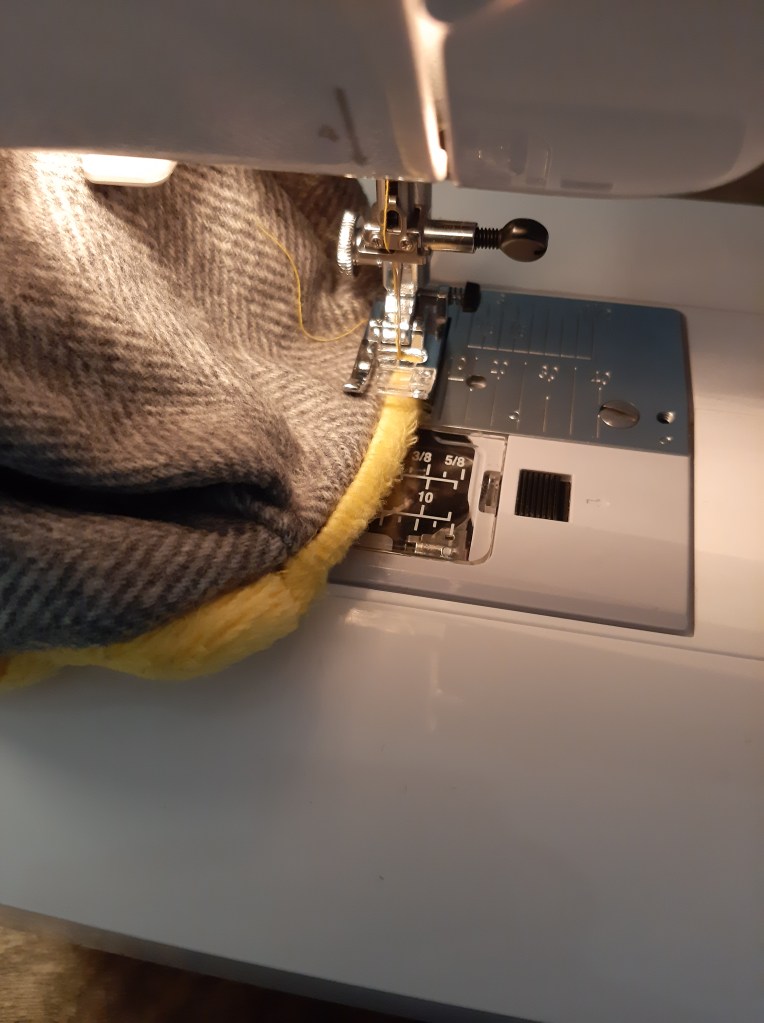
13. To finish, top-stitch the lining at the upper front as shown.
Now, settle back and enjoy your slippers! If you make a pair, do let me know – I’d love to see!
This pattern originally appeared in issue 99 of Love Sewing magazine in September 2021. If you enjoyed this tutorial, please consider subscribing – you’ll be the first to hear about Grinlow Studio tutorials and sewing patterns.
Support Grinlow Studio!
If you enjoy the articles, patterns and tutorials at Grinlow Studio, please don’t forget to subscribe, tell a friend, and – if you’re able to do so – make a purchase over on the patterns page to help keep our free content available to all. Many thanks for your support!

Wow. I’m definitely going to try to make these. Find my blog at this link https://thefreedomofless.wordpress.com/2022/11/19/the-freedom-of-less/
LikeLiked by 1 person
Yay! Looking forward to seeing them! 🙂
LikeLike